
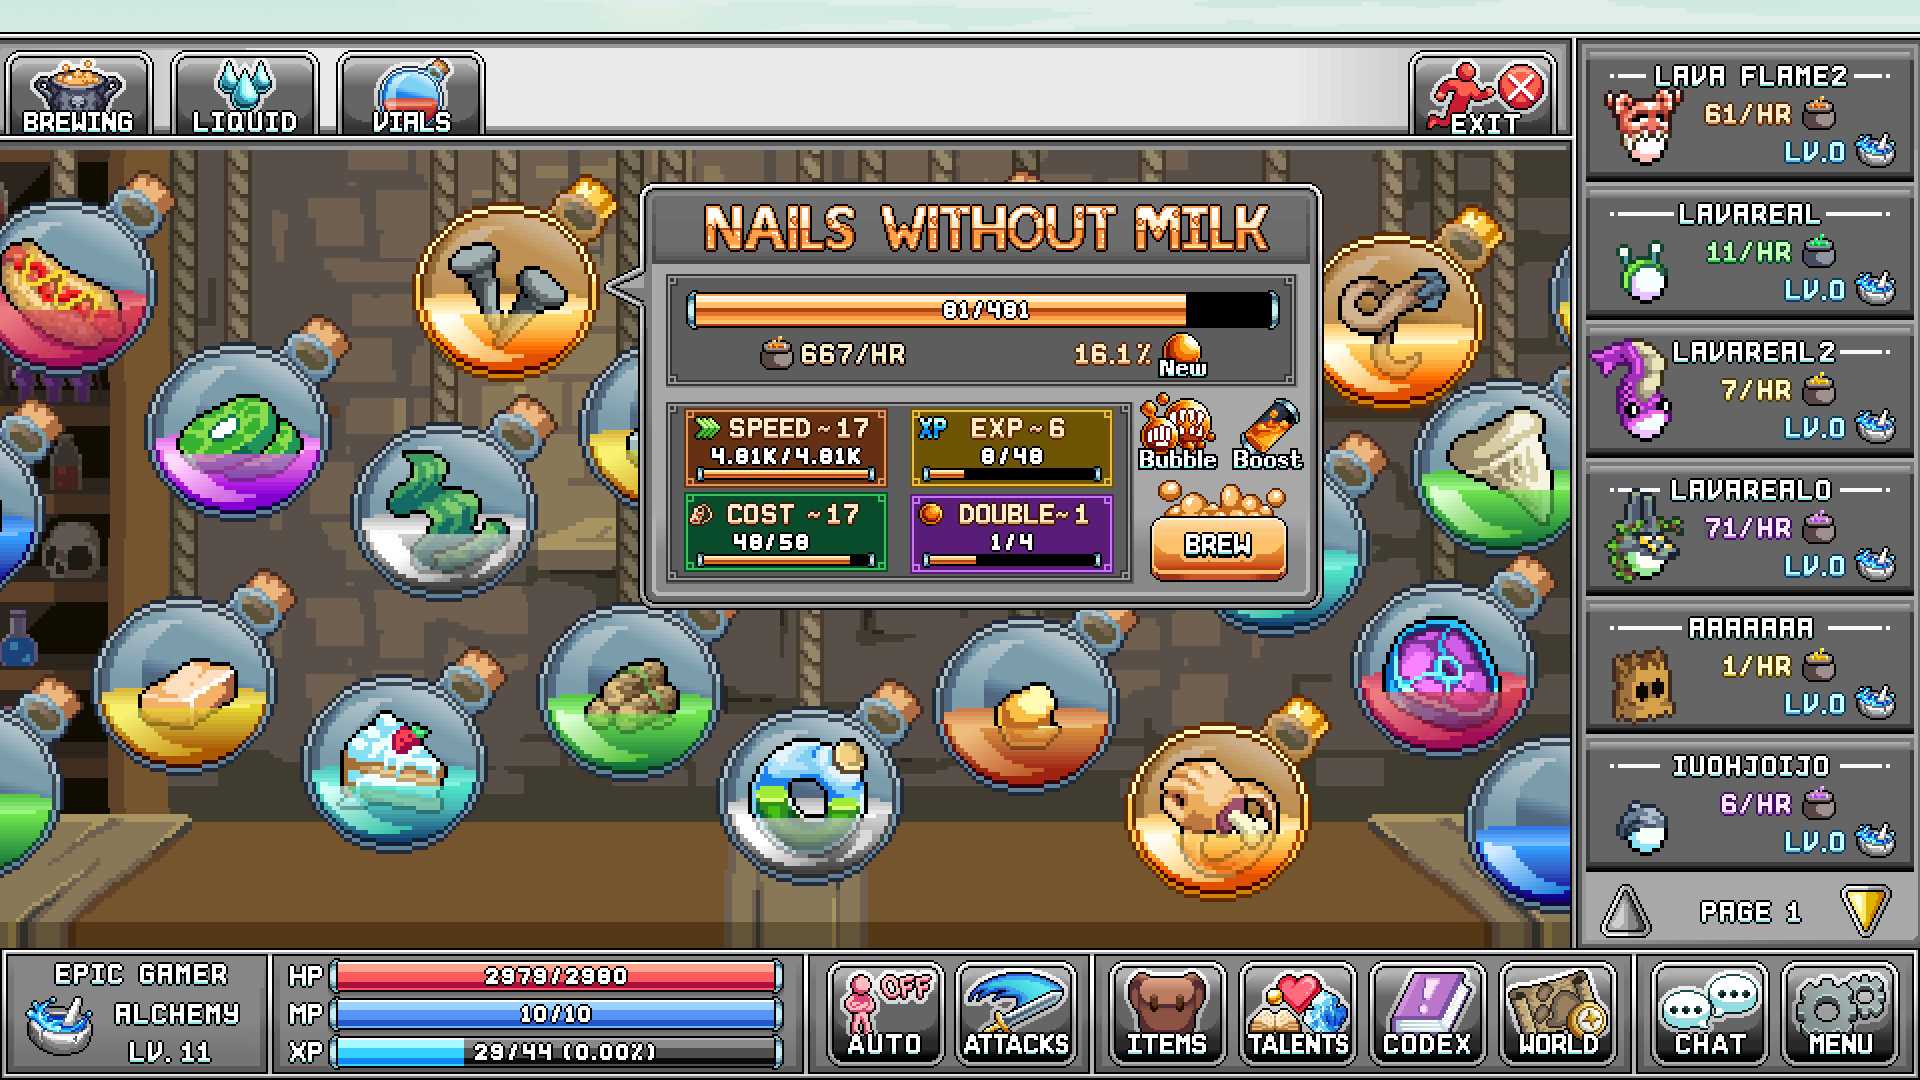
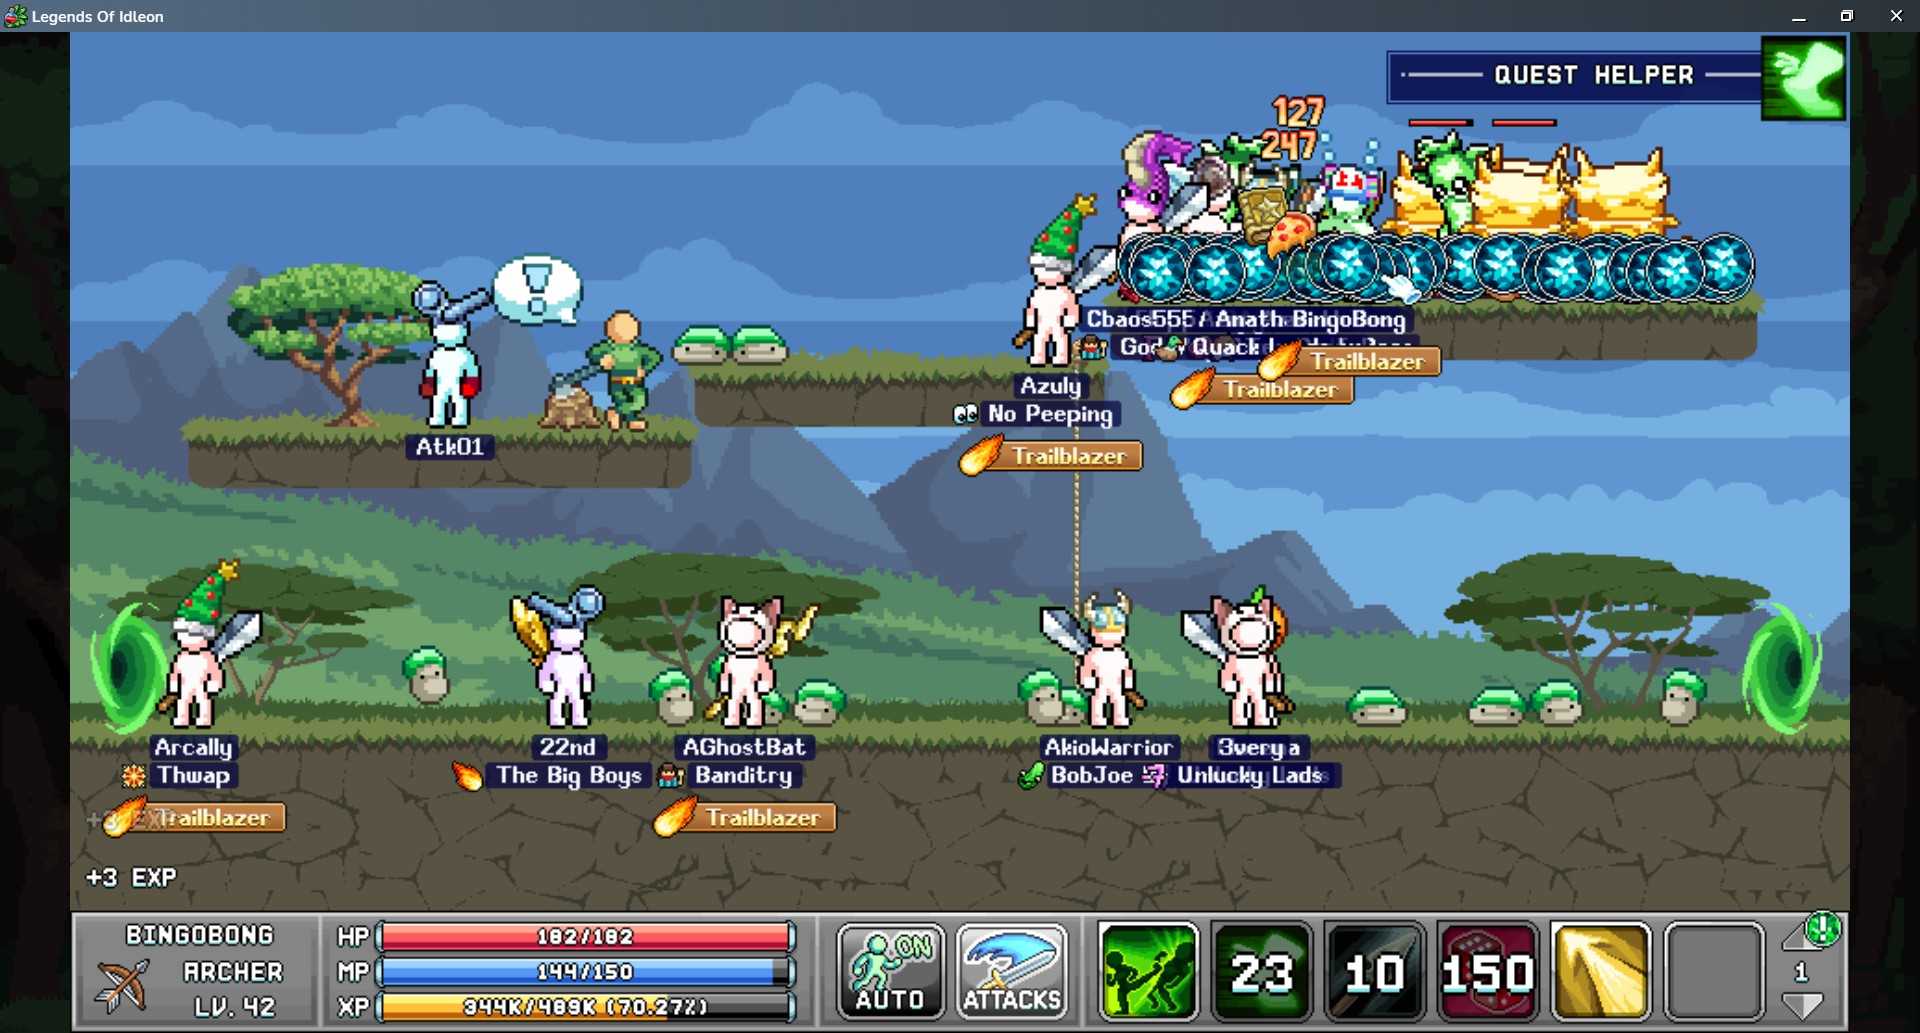
Магазин заслуг W1
| Описание | Стоимость заслуг | Ярусы | Эффекты |
| Инвентарная сумка применяется ко всем, но только если она есть у вашего 1-го персонажа. | 1 | 5 | Инвентарная сумка B, C, E, F, H, по порядку |
| Все мобы Blunder Hills возрождаются на 2% быстрее. Это увеличивает число убийств AFK в час! | 1 | 10 | +2% к уровню возрождения |
| +4% к опыту за персонажа с самым низким уровнем в вашей семье. | 1 | 12 | +4% к каждой покупке |
| Повышает максимальный ур. на x для таланта «Кубок гемоглобина». Это помогает выживанию | 2 | 10 | Первая покупка открывает Талант, +5 Максимум Уровней за Покупку LVL |
| Боссы теперь могут сбрасывать ключи босса. На 4% выше шанс выпадения ключа за покупку | 1 | 10 | 4-40% Выпадение 1 Ключа, в зависимости от Уровня Покупки |
| Разблокирует создание для Amarok EQ. Требуется выполнение заданий «Такой рок, очень собака, вау 1-5» (победить босса W1, Amarok) | 2 | 6 | Лапы Амарока 1 уровня, Лапы Амарока 2 уровня. Броня Amarok 3-го уровня, Шлем Amarok 4-го уровня, Подвеска Chaotic Amarok 5-го уровня |
| Более высокий шанс для мини-боссов в мире 1 получить новые звездные таланты. | 3 | 6 | +30% шанс за лвл |
Порядок приоритета:1. Получите все эквалайзеры Amarok, какие сможете2. Максимальная скорость возрождения %3. 1 лвл у Хемогоблина вокруг моркови и 3 лвл при достижении W24. Максимальный прирост опыта5. Максимальные ключи босса и минимум 1 уровень, когда вы можете убить Амарока6. Книга талантов 1 лвл, когда можно убить Бабу Ягу7. Сумки в прошлом
The Secret Fourth Class: The Journeyman
To briefly touch on this class. You cannot take another class and then switch to the journeyman. You must remain as the beginner blue character class until the journeyman hidden quest line is complete. You’ll have to do a lot of grinding without touching Promotheus. Don’t look at him and don’t even acknowledge him. You’ll have to gather resources and do things unrelated to him for awhile so just focus on leveling. The class you are after is much more time intensive to get than the others and you’ll want to again aim for this class upon character creation. Going for this is not something you should do half-heartedly. You should build a full luck character at creation. This is the luck based character and you’ll be using luck as your primary skill so only this character as the beginner class should be leveling it intensely(accuracy on your beginner character is based off luck in the beginning). The entire point of this character is to allow you to get the rare loot drops much easier than the other characters.
Archer’s secondary skill next to smithing is for looting and it’s still not nearly as good at it compared to the Journeyman
What you have to do to unlock them is for you to figure out. Good luck!
Гемы, как получать и на что тратить
![]()
![]()
![]()
![]()
![]()
![]()
![]()
Гемы! Самый драгоценный ресурс в игре! Как их можно получить?
Конечно же, самый простой способ получения гемов — это их покупка за реальные деньги.
Но, помимо этого способа, существует ещё много других!
Во-первых, при выполнении некоторых заданий и достижений, вам будут выдаваться Гемы в качестве награды, так что не поленитесь заглянуть, какие достижения вы можете выполнить!
Во-вторых еженедельные Подарочные коробки Гильдии, в которых вы сможете получить до 350 Гемов, в зависимости от того, как хорошо развита ваша Гильдия.
Но также вы можете и ничего не получить, ведь шанс выпадения 25 Гемов из 1 Подарочной коробки Гильдии составляет всего 5%!
В-третьих в конце каждого часа проводится мини-игра «Колючая Ловушка», получив награду в которой можно лишь один раз в день. Выживите как можно дольше и получите Гемы в количестве до 40 штук, в зависимости от прожитых раундов.
Чтобы попасть на локацию этой мини-игры, напишите в чате «If u love me let me go» (с учетом регистра, и не набирайте в чате гильдии/сервера)
На боковых платформах вас всегда ждет смерть, поэтому избегайте их ВСЕГДА!
Вы получаете Гемы, если сможете дожить хотя бы до второго раунда.
Если вы погибли в первом раунде, вы можете повторить попытку на следующий час, так как смерть в первом раунде не дает вам Гемов.
В-четвертых, вы можете получить Гемы при просмотре прямой трансляции разработчика игры, Lava_Flame2!
Разработчик любит устраивать раздачу Гемов на своем twitch-канале , рассказывать об обновлениях и весело проводить время со своими зрителями!
Также игра имеет свой discord сервер , на котором часто проводятся розыгрыши гемов, анонсируются стримы и обновления игры!
На что же тратить Гемы?
Первым делом вам необходимо купить ЗОЛОТУЮ НАКОВАЛЬНЮ за 300 Гемов, чтобы производить сразу 2 предмета, это значительно увеличит скорость повышения уровня Кузнечного Дела.
После покупки Золотой Наковальни, можно приобрести пак с Телепортами. Пак приобретается навсегда и ежедневно вам будут выдаваться телепорты. Очень удобная вещь.
Еще одной необходимой покупкой будет ПРИНТЕР за 875 Гемов, который даст вам возможность преумножать ресурсы, полученные с монстров.
Помимо этого, вы можете приобрести дополнительные слоты для вашего инвентаря и сундука за 200 и 175 Гемов, которые добавятся всем вашим персонажам.
Навыки повышения эффективности
Существуют эффективность майнинга, эффективность рубки, и кузнечная эффективность бафф навыки, а также. Но если вы поместите туда все свои очки, ваш урон будет низким и вы обнаружите, что эффективно убиваете скучающих бобов или лягушек, которые медленный прогресс. Так что на начальном этапе просто сосредоточьтесь на полировке своего показатель урона и когда вы будете готовы по-настоящему отточить навыки своего персонажа, тогда сосредоточьтесь на их специальности и вложите туда очки.
Основные уровни всегда 3 очка за навыки вашего класса и 3 за навыки вашего персонажа поэтому они гораздо более ценны, чем уровни навыков, и их следует в приоритете, когда вам не нужны ресурсы. Поэтому рекомендуется повышать характеристики урона, а не характеристики, основанные на навыках.
Я построил майнера, работающего только на эффективность, и у него ноль очков навыков в силе. Хотя они хорошо добываются, получить основные уровни сложно, так как урон, как правило, очень низкий. Мой другой воин — полная противоположность, с почти максимальной силой и скромным минированием, но достаточно сильным, чтобы эффективно тренировать существ в конце W1. Я использую добычу полезных ископаемых в качестве примера, потому что вы увидите, сколько потребуется шлифовки, когда вам понадобится железо для улучшения снаряжения, а не для рубки леса.
Bubonic Conjurer
![]()
Your bubonic conjurer will make use of his Raise Dead skill to actively farm mobs with great efficiency.
~~~~~~~~~~~~~~~~~~~~~~~~~~~~~~~~~~~~~
Setup
TalentsIncrease his max talent on Raise Dead, Chemical Warfare, Flatulent Spirit, Tenteyecle and Cranium Cooking to the 160 cap. You also want the Crystals 4 Dayys star talent maxed. You’ll want these skills on your bar in this order. Do not put other fighting talents as they will interfere with the optimal casting of these skills.
CardsYou want the genie card and poop card maxed and using the card doubler chips (250% extra crystal spawn chance). For the other cards, you want drop rate, money or XP while active, depending on current goal
Star Signs 15% Class EXP when fighting actively
4% Mob Respawn
15% Total Damage/-7% AFK OR 2% respawnPost Office Non-Predatory Loot Box capped for drop rate and crystal spawn chance
Potion Package capped for Cranium Cooking time increase
Magician Starterpack to reduce cooldowns
Utilitarian Capsule for cash from mobsShrines Clover
CrescentLab Chips Chocolatey Chip
Potato Chip
Omega Nanochip
Omega Motherboard
Silkrode Nanochip
Silkrode Processor
Silkrode Motherboard (if you have Beach Bro)OtherDrop rate and money obols. Beach Bro trophy if you have it. Don’t forget to equip all speed potions. If you have enough damage to insta-kill everything with poison, use the spear so your char moves around picking up items to help reduce lag.
~~~~~~~~~~~~~~~~~~~~~~~~~~~~~~~~~~~~~
Active Farming
Money & AlchemyThe ideal spot to farm money is Flomberges in world 4. You will get the most money from crystals there, as well as fastest proc of Raise Dead and Cranium Cooking thanks to Tenteyecle and the large amount of Flomberges on a small map.
World 1 StatuesThere is a lack of good maps with a lot of mobs in Raise Dead range to farm statues. You are likely better off using Maestro for this. The ideal map is likely Rats or Giga Frogs.
World 2 StatuesSand Castles is the best place to farm, although you could also try Sandy Pots for glass shards to improve the capacity stamp.
World 3 StatuesMammooths is a small map with relatively high mob count. It is perfect to farm statues in World 4, although the only statue of interest not in other worlds is the skill experience one.
Family Bonuses
Each class gives a family bonus. If you have more than one character with the same class and/or subclass, only the highest level character will provide the bonus.


| Class | Family Bonus |
|---|---|
| Warrior | +Total Strength |
| Archer | +Total Agility |
| Mage | +Total Wisdom |
| Journeyman | +Total Luck |
| Barbarian | +Weapon Power |
| Squire | +% Total HP |
| Bowman | +% EXP when fighting monsters actively |
| Hunter | +% Efficiency for all skills |
| Wizard | +Star Talent Points |
| Shaman | Higher Bonuses from Golden Foods |
| Maestro | Sample Size |
| Blood Berserker | +% Total Damage |
| Divine Knight | +% Refinery Speed |
| Siege Breaker | +% Faster Minimum Boat Travel Time |
| Beast Master | +% All Skill AFK Gains |
| Elemental Sorcerer | +Lv For All Talents Above Lv 1 |
| Bubonic Conjuror | +% All Stat. STR, AGI, WIS, LUK. |
| Voidwalker | +% Fighting AFK Gains |
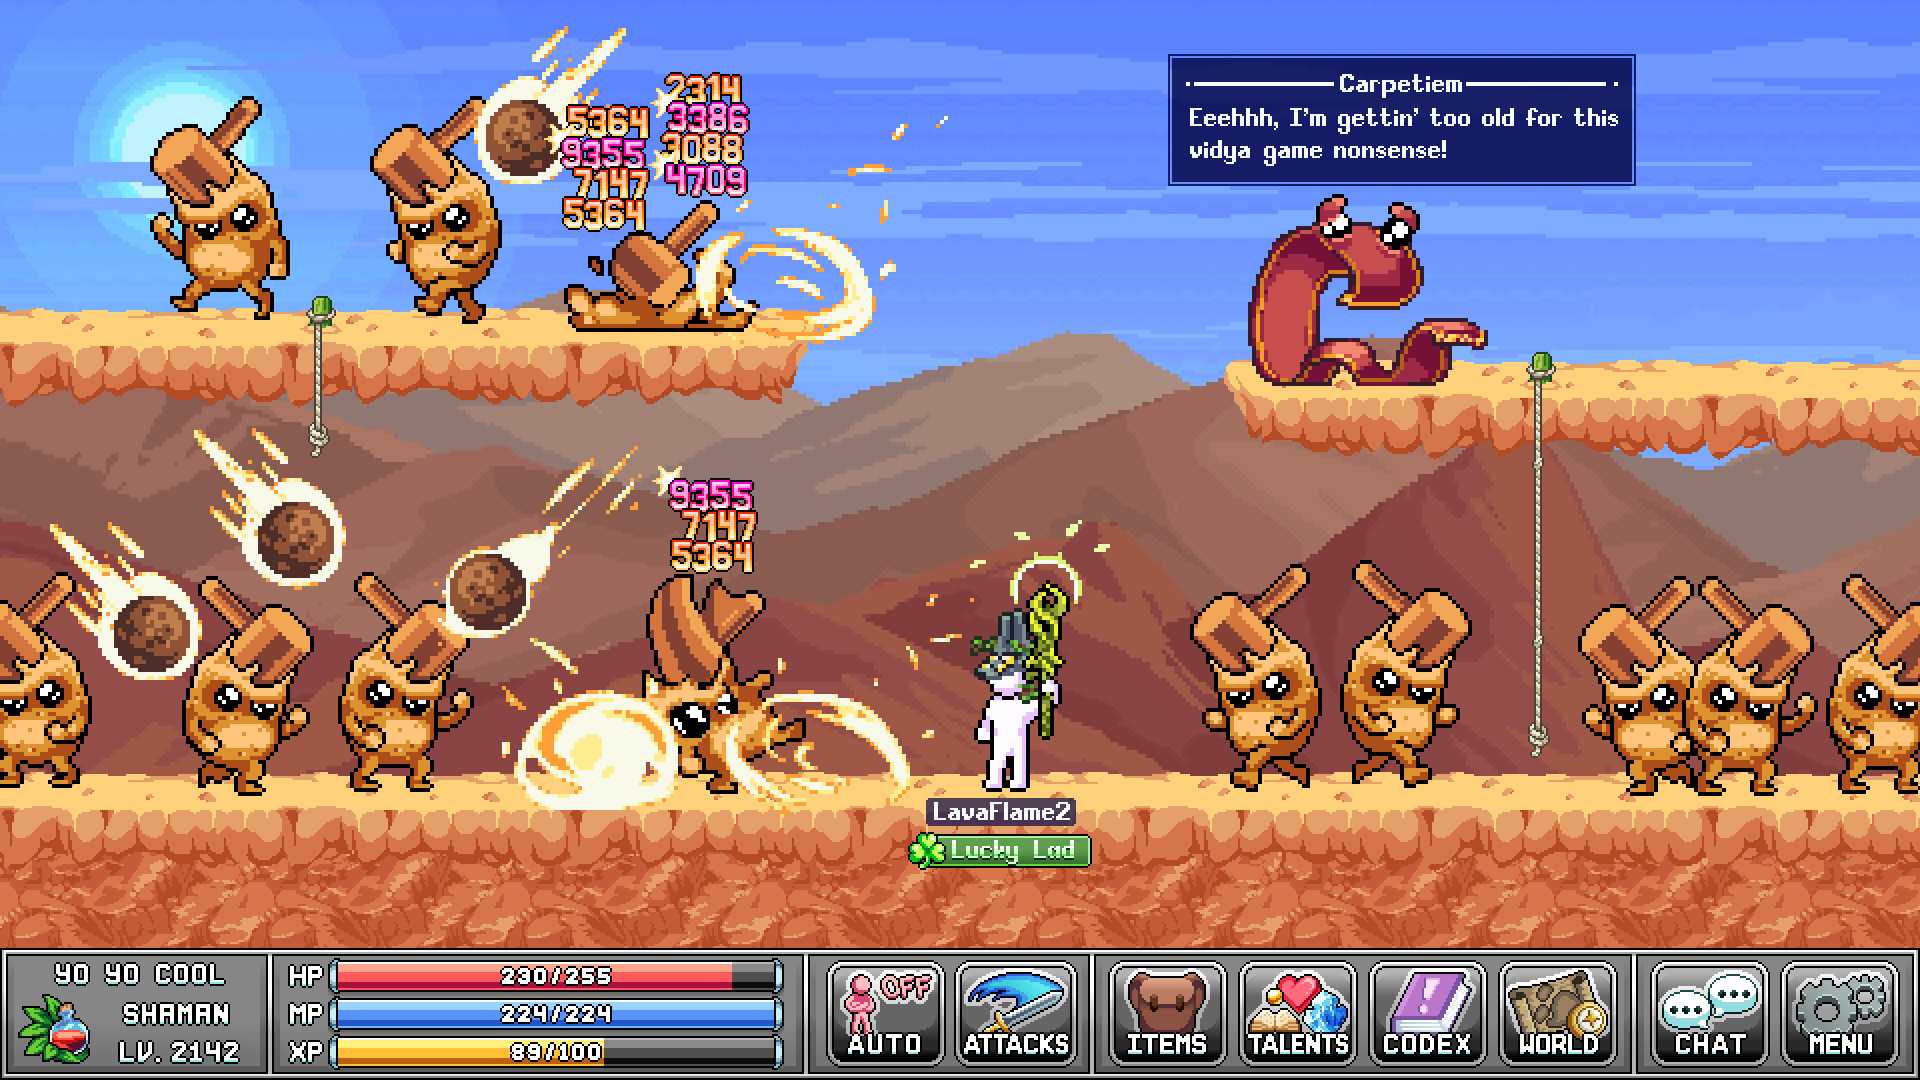
The Archer Class
The Archer is the weakest combat class, but deserves a special section to further showcase it’s useful synergy with the other classes. Not only is it your primary specialist with crafting having several skills that boost it and enhance it(Looking at you godly creation skill), but it’s also your early game primary looting class having the only character class skill of the first 3 classes that boosts chances of getting more rare loot drops. Considering it is not the most ideal combat class, it’s actually the one you’ll have fighting the most. Also the one running back and forth to town to craft so keep teleports for them when you can.
Personally I find my archer to be the most balanced class of them all being decent at nothing time consuming and having the most free time. I tend to have my archer do mining, woodcutting, and monster hunting while afk the most while my main miner is running in the background while I do other things. I might even go so far as to say that the archer is your unsung hero of your characters. You’ll likely never want more than 1 for now and yet it’ll be the one that will be doing all the grinding behind the scenes of your other characters and helping to gear them all up.
Ключевые советы
Тебе действительно нужнознать свои краткосрочные цели для ваших персонажей, когда вы их создаете, потому что вы не может изменить свой семейный бафф или удалить персонажей позже.
Вам захочется подберите класс к семейному баффу по мере того, как вы получаете дополнительные бонусы к характеристикам для их соответствия.
Есть больше помимо этих начальных классов, но о тех, о которых вы узнаете, когда доберетесь до них, или я действительно почувствую их и обновлю руководство.
Вы также хотите сохранить эти сбросы статистики для тех случаев, когда вам действительно нужно сосредоточиться на конкретном гринде для снаряжения, дропа или ресурса, потому что еженедельно вы будете получать не так много 1 осколок на городской магазин в день или одна десятая сброса характеристик.Не бойтесь копить баллы, а также не бойтесь их тратить.
Однако во время игры следует помнить, что вещи, которые специализируются на всем, как правило, ни в чем не преуспевают.
Other Characters
Your other characters will be stuck in the lab, and sample materials for the 3D printer. If they need more points to cap all their skill talents, take them out a bit for some progression and active crystal farming in world 4.
Only get enough skill levels to equip the best tools on your other chars. Then stop leveling and only sample. This will help keep your Maestro ahead.
You want their obols board to be filled with obols for their main skill.
Use Royal Sampler prayer on all your chars. Sampling caps at 90% so only level your prayer to about 30% sampling gains.
Those characters are there to keep the strong lab bonuses active for your main characters and sample materials for your alchemy/gear/stamps. That’s their only purpose. It’s good since that’s less stuff to manage.
Your Cornerstone Classes
Most of your characters will be more or less stuck in the lab to get the great bonuses it gives. Your progress and gains will be centered around 4 characters:
Bubonic ConjurerThis will be your main active farming character. He will farm cash, statues and drops.
MaestroThis will be your second active farming character. He can farm cash/statues, but more importantly will be the one killing bosses/minibosses as Maestro can get more total drop rate.
BowmanYour bowman will farm kills for your death note and green mushroom kills to improve your lab bonus to money. This will support your bubonic conjurer.
Blood BerserkerYour berserker will be cooking. He can produce large amounts of ladles each day to get you those significant cooking bonuses.
Classes
The 3 Starter Classes you’ll be able to reach at level 10 are these. I highly recommend focusing on getting one of each of these before aiming for the fourth as it will save you time in the long run. Here is a list of the 3 and their strengths and weaknesses
Warrior–Miner and can hit multiple enemies with class weapons each hit. Most balanced build
–Strength is the main stat
–Wisdom is the accuracy stat
Archer– Crafting and weakest combat class, but second best looter class
–Agility is the main stat
–Strength is the accuracy stat
Mage–Woodcutter and strongest attacks, but lowest defense
–Wisdom is the main stat
–Agility is the accuracy stat
Your main stats boost your character’s specialty skill in addition to your damage and these are generally what you will want to focus early on for leveling.
Mining efficiency is boosted by Strength.
Crafting efficiency is boosted by Agility.
Woodcutting efficiency is boosted by Wisdom
Afterword
I never did talk about weapon power or even defense, but well… you’ll figure it out. Just know they only affect your combat abilities which is why I didn’t talk much on them. A bonus tip for defense is to treat it like youraccuracystat and only level it if the mob you are facing can hit you until it can’t. That will save you a lot of money in the long run because you don’t want to be buying food and potions unless you have to. Gear will protect you for a lot of the early game mobs same asaccuracy is carried by it. Combat is important to prep, but as a new player, you really want to focus on getting your gear up and be always grinding for the next piece. It carries most of the early game burdens for you after all and will ultimately carry you in the late game too so it’s a good mindset to prep early on and establish as your ever present short term goal path.
See you out there fellow gamers!
Written by Brisingr
This is all about Legends of Idleon MMO – New Player Character Creation and Stat Point Spending Tips; I hope you enjoy reading the Guide! If you feel like we should add more information or we forget/mistake, please let us know via commenting below, and thanks! See you soon!
Recommended for You:
Key Tips
You really need toknow your short term goals for your characters when you create them because you can’t change their family buff or delete characters later.
You’ll want to match the class to the family buff as you gain the additional stat buff bonuses for matching them.
There is more beyond these initial classes, but those you’ll learn about when you reach them or I really get a feel on them and update the guide.
You also want to save those stat resets for when you really need to focus on a particular grind for gear, a drop, or resource because there aren’t many you’ll get weekly 1 shard per town shop per day or one tenth of a stat reset.Don’t be afraid to save points and also don’t be afraid to spend them.
A good thing to remember though as you play is, things that specialize in everything tend to excel at nothing.
Archer
Archer is the second of the three class choices you get from Promotheus and is necessary to unlock Bowman and Hunter as a tertiary class choice from Speccius, and supsequently Siege Breaker or Beast Master from Eliteus.
| Class | Notes | |
|---|---|---|
| Archer | Archers use and specialize in Smithing.
Archers gain Damage from Agility and Accuracy from Strength. In a quick summary, Archers fight from range and are an efficient, adaptable class set. An extra multiplier to HP and MP, the ability to make their standard attack double-strike as well as Crit and boosts to loot drop rates are endlessly useful. They also have the rare ability of having their damage improved through a completely self-automated activity, anvil Production, through Veins of the Infernal |
|
| Bowman |
Bowman is an Archer subclass that specializes in Catching.
Archers gain Damage from Agility and Accuracy from Strength. A Bowman archer goes further into the combat style of putting out a very large number of attacks against one or many opponents. Through Magic Shortbow and Flax Instastring their standard attack becomes an occasional triple-strike, and the highly adaptable Homing Arrows can put up to 8 shots into several targets, or one target for high damage, and has excellent horizontal and vertical range. |
|
| Hunter |
Hunter is an Archer subclass that specializes in Trapping.
Archers gain Damage from Agility and Accuracy from Strength. Compared to a Bowman, the Hunter focuses more on single-target damage and mob hunting. Their standard attack can upgrade to a triple-strike through Have Another…Again!, each of which is still able to independently Crit, and they have the rare ability to make mobs quickly respawn after death through Uwu Rawrrr, allowing for highly efficient non-AFK combat. |
|
| Siege Breaker |
Siege Breaker is a Bowman elite class that specializes in Sailing.
Archers gain Damage from Agility and Accuracy from Strength. The Siege Breaker enhances the multi-attacking Bowman even further with several new multi-striking skills. It also has the unique ability to spawn special Plunderous mobs through Pirate Flag, special mobs with the HP, EXP and Drops many times that of the standard mobs in the area, allowing for very efficient mob hunting. |
|
| Beast Master |
Beast Master is a Hunter elite class that specializes in Breeding.
Archers gain Damage from Agility and Accuracy from Strength. The Beast Master enhances a Hunter to be a bit more like the multi-attacking Bowman; it gets a number of summoning abilities that can put out multiple attacks on nearby enemies while the Beast Master fights elsewhere. It is also the only class that can have its standard attack upgraded to a Quad strike through Have Yet Anotha One. |
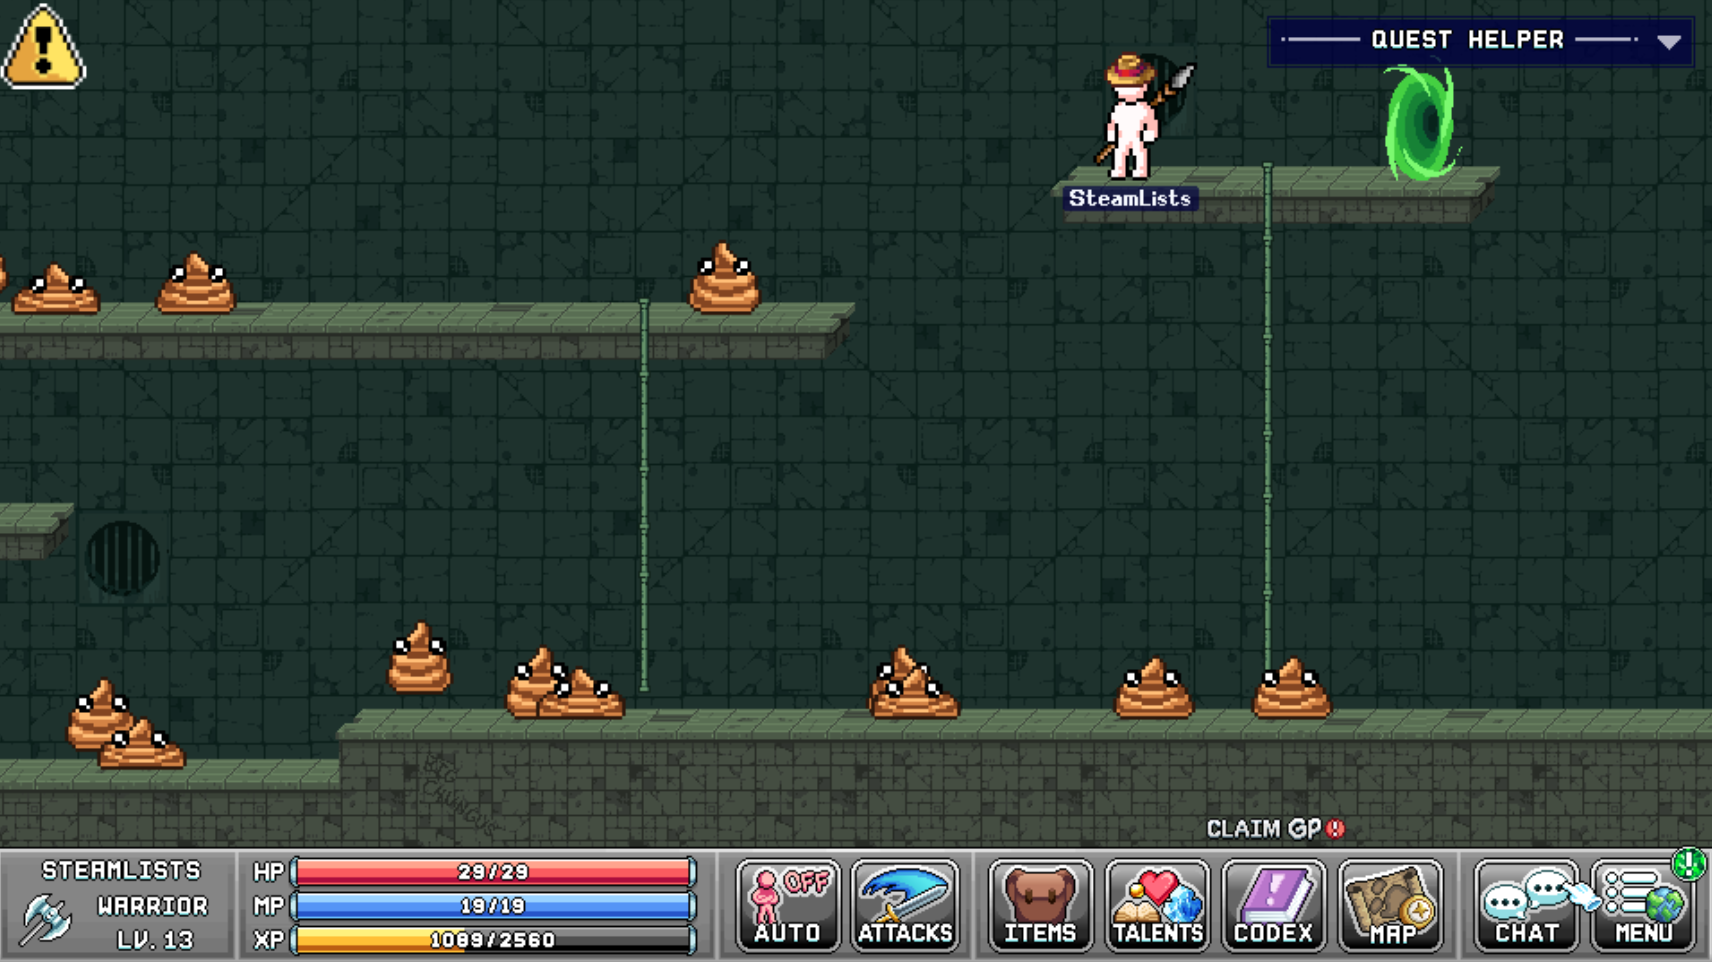
Смерть
![]()
Итак, смерть в этой игре предоставляет вам 2 варианта:
● Town Respawn, при котором вы возрождаетесь в городе;
● Insta-Rez, который возрождает вас на месте гибели (ограничено, но обновляется ежедневно).
О смерти в этой игре следует сказать следующее:
● Вы ничего не теряете после смерти (монеты, предметы и т.д.)
● Вы можете подбирать предметы во время смерти (поэтому подбирайте их перед возрождением в городе)
● Вы принудительно возвратитесь в город через 10 минут (это время дается вам для того, чтобы подобрать предметы)
● Вы можете использовать это как быстрый телепорт в город, если вы находитесь в очень далеком от города, месте.
Рекомендуется сохранять Insta-Rez для боев с боссами или непредвиденных смертей от кристаллических монстров.
Source: https://steamcommunity.com/sharedfiles/filedetails/?id=2789534453
Секретный четвертый класс: подмастерье
Кратко коснемся этого класса. Вы не можете выбрать другой класс, а затем переключиться на подмастерья. Вы должны оставаться синим классом персонажей-новичков до тех пор, пока не будет завершена скрытая линия квестов подмастерья. Вам придется сделать много шлифовка, не касаясь Promotheus. Не смотрите на него и даже не признавайте его. Вам придется некоторое время собирать ресурсы и заниматься делами, не связанными с ним, так что просто сосредоточиться на выравнивании. Курс, который вы хотите получить, требует гораздо больше времени, чем другие, и вы захотите снова стремиться к этому классу при создании персонажа. Идти на это не то, что вы должны делать вполсилы. Вам следует построить полную удачу персонаж при создании. Это персонаж, основанный на удаче и вы будете использовать удачу в качестве своего основного навыка, поэтому только этот персонаж как начальный класс должен интенсивно прокачивать его.(точность вашего начального персонажа зависит от удачи в начале). Весь смысл этого персонажа в том, чтобы позволить вам получить редкий лут падает намного легче, чем другие персонажи.
Второстепенный навык лучника рядом с кузнечным делом предназначен для мародерства, и он все еще не так хорош по сравнению с подмастерьем.
Что вам нужно сделать, чтобы разблокировать их, вам предстоит выяснить. Удачи!
точность
Уровняйте свой показатель точности.
Вы можете пройти на характеристики снаряжения и горсть очков за первые 5-6 областей, но тогда вам очень нужен ваш точность для последовательного попадания. Не бойтесь фармить этих более слабых мобов немного дольше, если это означает получение гарантированных ударов при каждой атаке на мобов в следующей области.
Не превышайте уровень точности.
Выровняйте его только там, где вы можете всегда бить мобов в области, в которой вы находитесь. Иногда, если вы собираетесь войти в новую область и только что повысили уровень, вам следует удерживать эти точки, чтобыузнать, что именно вам нужно, чтобы гарантировать хит. Вы можете проверить, зайдя в информационное меню афк и глядя в левый нижний угол.


Например Хорошо нужно только 27 точности, чтобы попасть, так что вам вряд ли понадобится стат баффы ударить их, но Морковный человек нужна точность 45, поэтому вам нужно немного больше точности. Всегда проверяйте это в новой области, если вы пропали без вести, чтобы вы могли выяснить, сколько очков статистики вам понадобится. доведите свою боеспособность до 100% не тратя их впустую на выравнивание.
Mage
Mage is the third of the three secondary class choices you get from Promotheus and is necessary to unlock Shaman and Wizard as a tertiary class choice from Speccius, and supsequently Bubonic Conjuror or Elemental Sorcerer from Eliteus.
| Class | Notes | |
|---|---|---|
| Mage | Mages use Wands and specialize in Choppin.
Mages gain Damage from Wisdom and Accuracy from Agility. With no additional HP multiplier, no core need for Strength and mage-specific armor having the lowest Defense of what is available, Mages are very, very fragile, far more than any other class set. However, with an additional MP multiplier and their focus on Wisdom for attack and multiple separate enhancers to both their damage output and the amount of damage enemies take, Mages can fire very highly enhanced skills very frequently for excellent damage output…as long as you can keep them from being hit too much. |
|
| Shaman | The Shaman is a Mage subclass that specializes in Alchemy.
Mages gain Damage from Wisdom and Accuracy from Agility. Shamans are the tougher of the two Mage subclasses, giving extended Invincibility duration when they are hit through Instant Invincibility and two skills that can either damage enemies, heal themselves or both. |
|
| Wizard | The Wizard is a Mage subclass that specializes in Worship.
Mages gain Damage from Wisdom and Accuracy from Agility. Wizards focus almost purely on damage output. They get multiple active skills for unleashing carnage on entire groups of enemies at once, and the ability to accelerate their standard attack rate through Speedy Book. When it comes to pumping out damage, this class is almost unmatched. |
|
| Bubonic Conjuror | The Bubonic Conjuror is a Shaman elite class that specializes in Laboratory.
Mages gain Damage from Wisdom and Accuracy from Agility. The Bubonic Conjuror enhances the Shaman in AoE combat and damage over time, through a multitude of wide-area poison-style attacks. Combined with the ability to resurrect mobs through Raise Dead, this can let the Bubonic Conjuror do strong bursts of active mob hunting. |
|
| Elemental Sorcerer | The Elemental Sorcerer is a Wizard elite class that specializes in Divinity.
Mages gain Damage from Wisdom and Accuracy from Agility. The Elemental Sorcerer enhances the damage-dealing ability of the Wizard to the absolute limit, and is arguably the highest damage-dealing class in existence, although also the most fragile of the Elite classes. Multiple catastrophic new spells with some of the highest damage outputs known become available, as well as Chaotic Force which allows your standard attacks to also spawn one of several second-tier spells. |
Alchemy
Focus on bubbles multiplying passive bubbles of that color when using that class, as well as the bubbles giving a discount for the cauldron’s bubbles. Don’t forget to be on a character of the right class when upgrading bubbles, since the multiplier bubble will also work on the discount bubble, so you need to right class to benefit from the multiplier bubble.
Important bubbles to focus on:
The two multiplier bubbles in each cauldron
The discount bubbles (caps at 95% with multi bubbles)
Mr Massacre for Bowman’s AFK gains
Cookin Roadkill for active Bubonic Conjurer
Hammer Hammer for Bowman candy usage (+ everyone else)
Base stat bubbles
Equipable skill bubbles for sampling
Skill gain bubbles
Diamond Chef
Money gain bubbles
Efficiency Buff Skills
There are mining efficiency, woodcutting efficiency, and smithing efficiency buff skills as well. Should you sink all your points in there though, your damage will be low and you’ll find yourself only efficiently killing bored beans or frogs which will slow progress. So for early on, just focus on buffing your damage stat and when you are ready to really grind your character skill, then focus on their specialty and put points in there.
Main levels are always 3 points in your class skills and 3 for your character skills so those are far more valuable than skill levels and should be prioritized when you’re not needing resources. Hence why damage stats are recommended to level over skill based ones.
I built a miner going only for efficiency and has zero skill points in strength. Although they mine well, it’s hard to get main levels since the damage is generally so low. My other warrior is the exact opposite with near max strength and mines modestly, but hits hard enough to train at end of W1 creatures efficiently. I’m using mining as the example because you’ll see how much grinding is needed when you start needing iron to upgrade gear as opposed to woodcutting.
Открывает 2-ю вкладку «Наковальня».
Наивысший приоритет и, скорее всего, разблокирован перед некоторыми более низкими приоритетами на вкладке 1.
1 королевский штык + 25 драгоценных камней
2 шипастых угрозы + 25 драгоценных камней
3 звездного света + 25 драгоценных камней
Следующий приоритет
4 пули + пуля FMJ
5 золотых кирок + средний горный мешочек
6 золотых топоров + средний мешочек для еды
7 золотых удочек + средний мешок для рыбы
8 Позолоченная сеть + Мешочек среднего жука
Третий приоритет
9 бинтов + 25 драгоценных камней1. Принудительный слэшер + 25 драгоценных камней1. Лук фараона + 25 драгоценных камней1. Воронье гнездо + 25 драгоценных камней
Четвертый приоритет1. Кепка викингов + шкура с шипами1. Гладкий капюшон + дикая кожа1. Шляпа ведьмы + Свернутые одеяния
Пятый приоритет, когда вы можете их использовать1. Путешественники по пещерам + 25 драгоценных камней1. Сапоги рыболова + 25 драгоценных камней1. Каблуки лесоруба + 25 драгоценных камней2. Бандитские сапоги + 25 драгоценных камней1. Песчаная сумка + 25 драгоценных камней2. Platinet + Сумка от насекомых большого размера2. Slurpin Herm + Поджаренное масло с маслом2. Большая сумка для еды + большая сумка для материалов2. Платиновая кирка + Вместительный шахтерский мешочек2. Plat Hatchet + большой мешочек Choppin2. Плоская удочка + большая сумка для рыбы
Низкий приоритет2. 70 Драгоценные камни2. 70 Драгоценные камни
*Числа впереди указаны в том порядке, в котором они появляются в магазине разблокировки.
Вся информация взята из Idleon Wiki.
Написано Исход
Рекомендуется для вас:
Blood Berserker
Your blood berserker cooks. That’s it.
~~~~~~~~~~~~~~~~~~~~~~~~~~~~~~~~~~~~~
Setup
TalentsIncrease the caps on his cooking/skill efficiency talents.
Cards Amarok and Bunny cards for AFK Gains
Chaotic Troll for skill efficiency
Chaotic Efaunt and Mutated Mush for cooking EXPStar Signs OG Skiller
2% Skill AFK
4% Skill AFKPost Office Chefs Essentials
Myriad CratePrayers Skilled DimwitLab Chips Omega Nanochip
Omega Motherboard
Conductive Processor
Silkrode Nanochip
Silkrode Processor
2x Galvanic MotherboardOtherPersephone’s bouquet of course is a must, which is doubled to 30% AFK gains with the Silkrode Processor. You’ll also want the upgraded Chef Hat Shoes and 2x Chef Ring. If you don’t have those, farm them with your Maestro or Bubonic Conjurer.
Don’t forget to chow all the mobs first.
Secret Class
The fourth class option is hidden behind a set of Secret quests.
| Class | Notes | |
|---|---|---|
| Journeyman | To get this class you have to be a beginner and do a Secret questline.
Journeyman use Fisticuffs and specialize in . The Journeyman class gets Damage and Accuracy from Luck. |
|
| Maestro | To get this class you have to be a Journeyman and do a Secret questline.
The Maestro is a Journeyman subclass that specializes in All Skills. The Maestro class gets Damage and Accuracy from Luck. |
|
| Voidwalker | To get this class you have to be a Maetro and do a Secret questline.
The Voidwalker is a Journeyman elite class that specializes in All Skills for all characters. Voidwalker also has a unique talent system based on «Speedrunning» in the Void using the Talent. The Voidwalker class gets Damage and Accuracy from Luck. |
Maestro
Your Maestro will farm the bosses/minibosses, as well as statues on maps with rare drops where your Bubonic Conjurer cannot effectively use Raise Dead. Your Maestro will also boost the skill efficiency of all your other characters.


Only get enough skill levels to equip the best tools on your other chars. This will help keep your Maestro ahead.
~~~~~~~~~~~~~~~~~~~~~~~~~~~~~~~~~~~~~
Setup
TalentsYou want Cmon Out Crystals, Gimme Gimme, Rares Everywhere!, Crystal Countdown, Printer Go Brrr, and Right Hand of Action capped. All the rest doesn’t need to be capped but more damage is better. Level the talent Curse of Mr Looty Booty as much as you can while still one-hitting the crystals.
CardsYou want the genie card and poop card maxed and using the card doubler chips (250% extra crystal spawn chance). For the other cards, you want drop rate, money or XP while active, depending on current goal.
Star Signs 15% Class EXP when fighting actively OR 5% Drop Chance
4% Mob Respawn
15% Total Damage/-7% AFKPost Office Non-Predatory Loot Box capped for drop rate and crystal spawn chance
Magician Starterpack to reduce cooldowns
Any of the boxes that help with damage/skill gainsShrines Clover
CrescentPrayers Midas Minded while killing bosses/minibosses. Also for crystals you can 1-hit with the prayer active.Lab Chips Chocolatey Chip
Potato Chip
Omega Nanochip
Omega Motherboard
Silkrode Nanochip
Silkrode Processor
Silkrode Motherboard (if you have Beach Bro)OtherDrop rate and money obols. Beach Bro trophy if you have it. Don’t forget to equip all speed potions.
~~~~~~~~~~~~~~~~~~~~~~~~~~~~~~~~~~~~~
Active Farming
MoneyThe ideal spot to farm money is Clammies in world 4. They give good money but most importantly you will be needing Pealer Shells for various tools/bags.
World 1 StatuesSlimes is the best map, although if you don’t have full POP obols, farm Giga Frogs. The imporant part is never being idle waiting for mobs to respawn.
World 2 StatuesSand Castles is the best place to farm, although you could also try Sandy Pots for glass shards to improve the capacity stamp. Moonmoons are also good if you need ghosts.
World 3 StatuesA lot of maps will work here. You can go for any maps where you don’t end up idling, if you need materials/rares from that specific mob.
Bosses & Minibosses
Farm them on Maestro with the Midas Minded prayer and capped Curse of Mr Looty Booty. Switch to full drop rate cards. Be sure to have your obol boards completed with all drop rate obols. You want to maximize rare/candy drops. Maestro has talents which allows to reach highest drop rate possible in the game.


